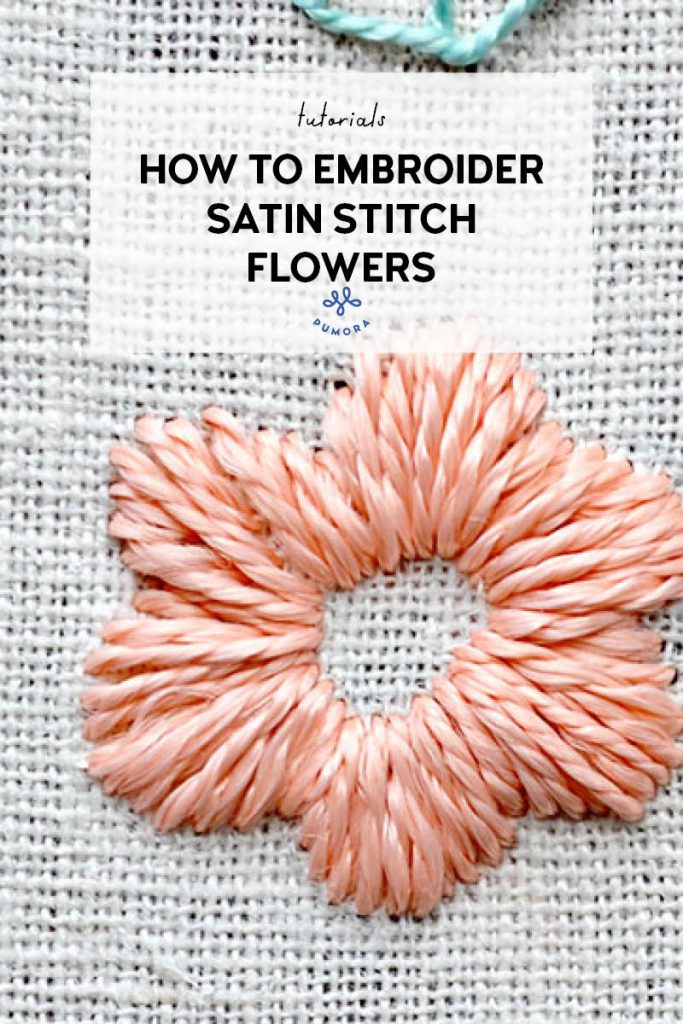
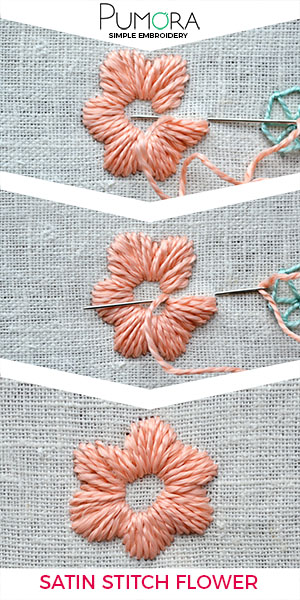
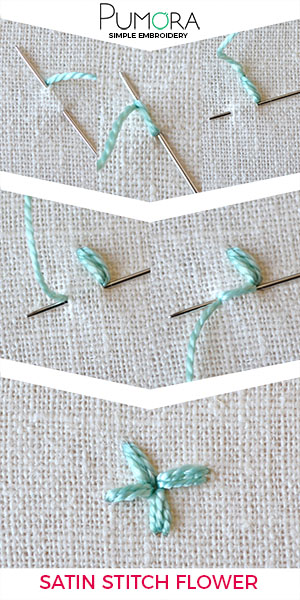
Last but not least, here comes Mrs. Does-it-all *drumroll*: the satin stitch flower. I have referred to the satin stitch as satan stitch before because it does take some practice to get it perfect and sometimes it’s just annoyingly not doing what it should.
Disclaimer: this article contains affiliate links.
Nevertheless, the satin stitch technically is one of the easiest stitches! You can use it to cover tiny, small and medium areas and make all kinds of shapes. Satin stitch makes a very smooth and polished looking surface which sets it apart from all the stitches we used in the other parts of the series which have distinct lines to show.

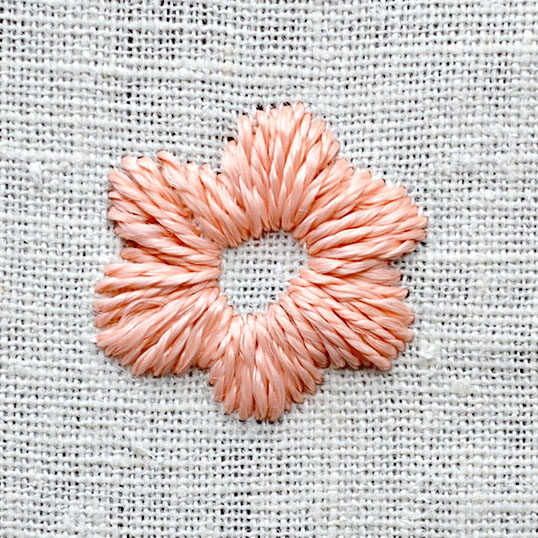
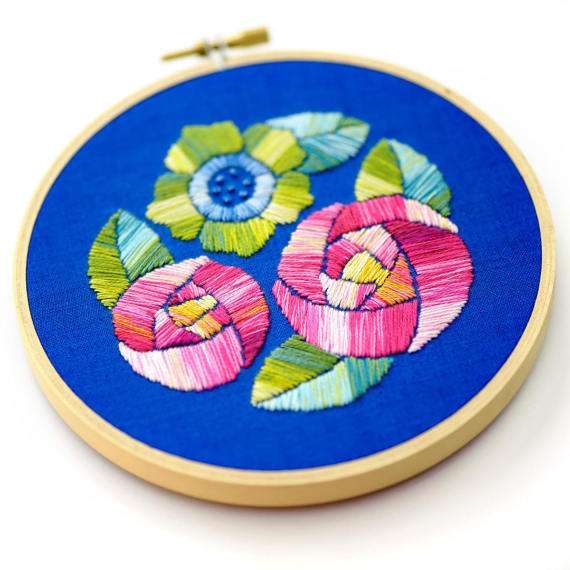
To give your flowers more dimension you can blend in a darker and lighter color or even several colors. Here is an example from Lolli and Grace (you can find the pattern here):
Advice from a Pro: Anne from Lolli and Grace
Anne from Lolli & Grace does not only share the same name with me, but she is also creating colorful embroidery patterns, featuring beautiful satin stitches, too! I contacted her to get some advice from someone who I consider a satin stitch Pro. Here is Anne’s slice of satin stitch wisdom for you:
Satin stitch can sometimes frustrate even experienced stitchers, but here are a few things that will hopefully help you learn to love it as much as I do:
Get into the flow
Some stitches are easy to master even after just a few tries. Satin stitch, while seemingly simple, is one that truly takes just a little bit of practice. After you’ve done it for just a bit, your hands and brain will find a sort of rhythm, and the needle will find the place to come up and go down much more easily. This means that if you’ve never satin stitched at all, it might take you a couple of flower petals or a small design to get a good feel for it.
For more experienced stitchers, your first satin stitches after a break might not “flow” as well as the stitches you make once your hands/brain are warmed up. This is definitely the case with me – even though I’ve stitched a LOT of satin stitches, I still have to give myself some grace (and patience) when I pick up my project again. I can always feel it when it all starts to “click.”
Strip your threads individually
If you are using stranded thread, how you separate your strands makes ALL the difference. You’ll want to strip/recombine the threads rather than simply untwisting them. Before I learned this, I thought, “Bah, that doesn’t seem like it would make such a big difference.” But trust me, it does. Stripped threads will lay so much more smoothly on your fabric.
Get the best coverage
Sometimes more strands is better (depending, of course, on the size of the shape you are wanting to fill). If you use too few strands on a larger shape, you’ll need to make a lot more stitches to cover the area, and you won’t get that lovely plump effect. Too many strands in a tiny shape could just look lumpy. A good pattern should tell you exactly how many strands to use. If you are working on your own design, do a little bit of experimenting to see what gives you the best coverage, both along the edges of your shape and in the filled area.
Take Action
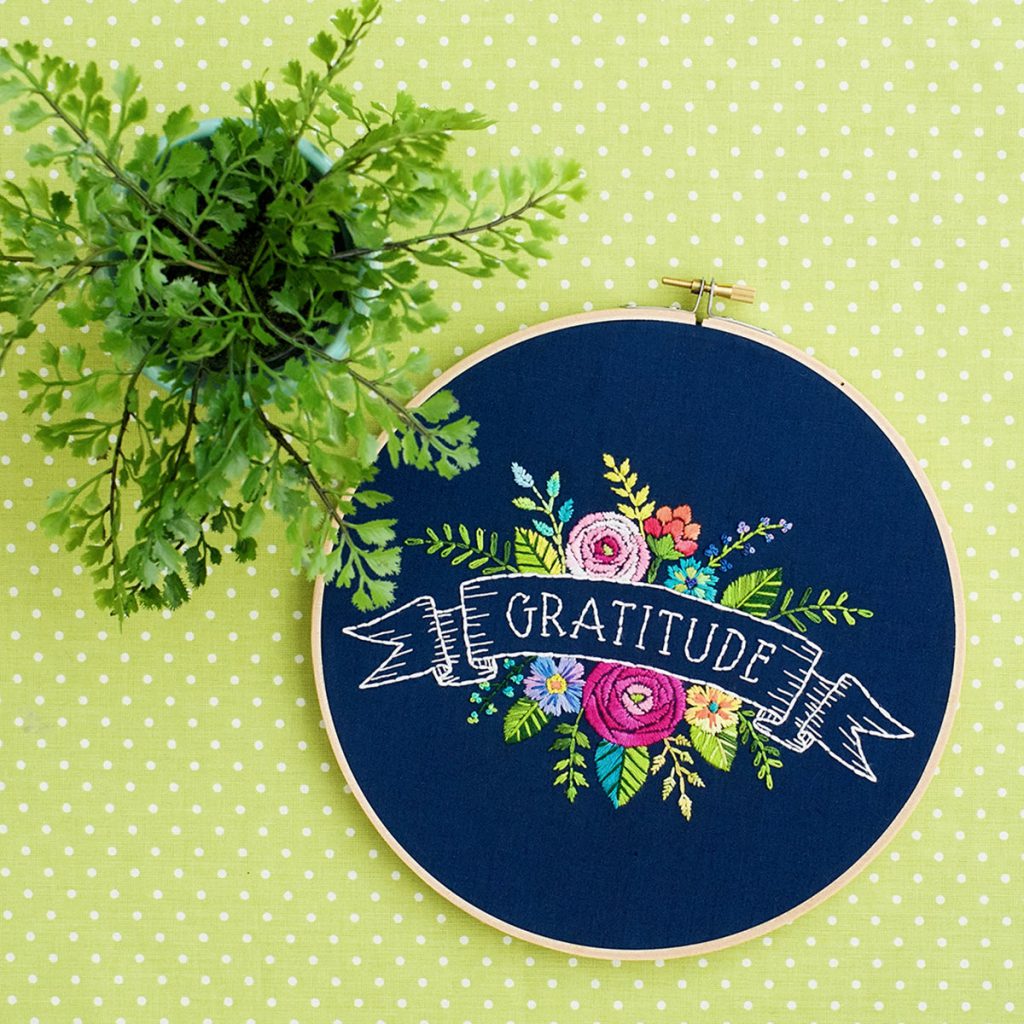
Now you have the tools and info you need to get started with satin stitch flowers. It’s time to get your needle and thread! Anne has a great pattern to get into the flow of satin stitch and get your own piece of embroidery art bursting with color:
What’s next?
The satin stitch flower also marks the final post. I hope you liked this series of tutorials! I enjoyed using some of my special vintage threads from my stash for you. If you enjoy flower embroidery, you might like my newer flower series with video tutorials! Hop over here to see the full list of flowers.
Flower stitch book
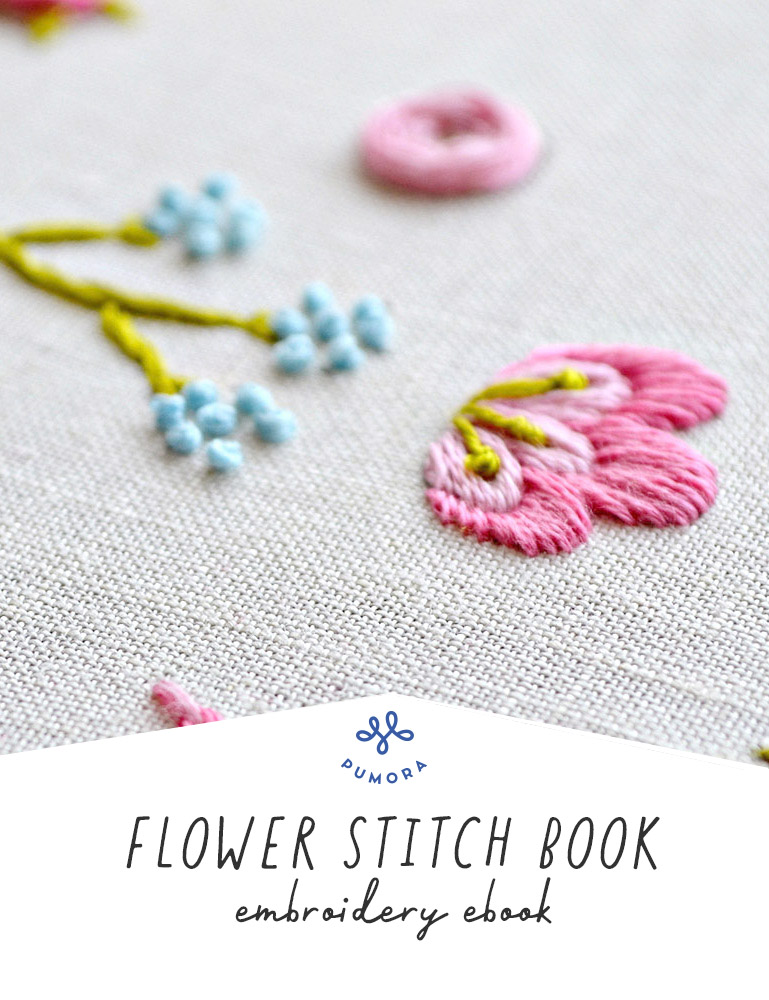
For more detailed instructions, you can get the Flower embroidery stitch book in my Etsy shop. It contains step-by-step photo instructions with detailed explanations.
No time right now? Pin for later!