Chain stitch is one of those versatile stitches that you can use for almost everything. It works great for letters, outlines, filling areas large or small, mimicking knit stitches on garments and don’t get me started with the variations of this embroidery stitch (hint: over 30 chain stitch variations are over here in the stitch lexicon)
While a simple chain stitch is not that difficult to embroider, there are circumstances where this stitch might look not as neat as it could. After using the chain stitch A LOT for multiple purposes I want to share some tricks with you.
How to embroider chain stitch
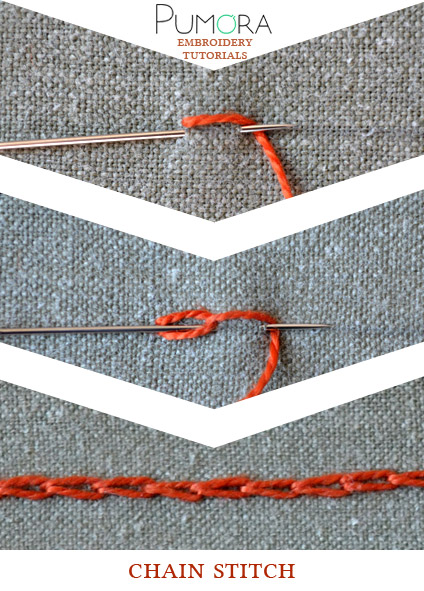
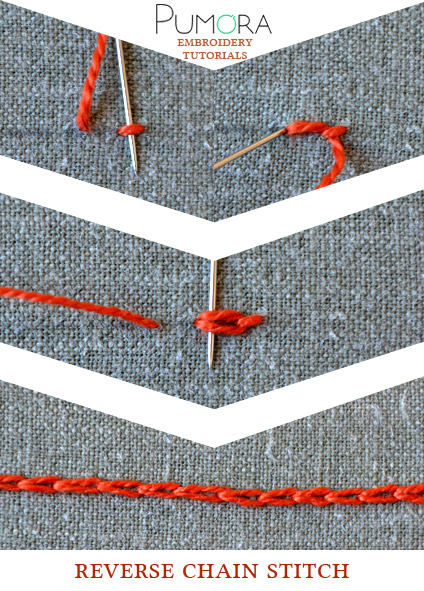
First of all, let’s take a look at how chain stitches can be embroidered. There are two ways to achieve this. If you have trouble with the conventional method you might want to give the reverse chain stitch a try.
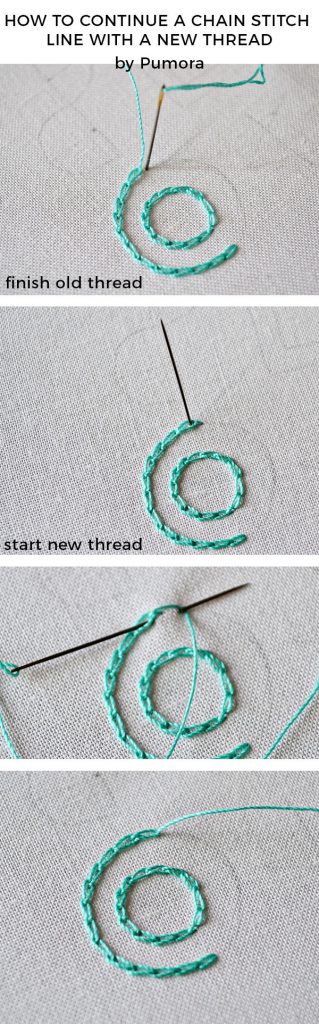
What if you have to change threads in between stitches?
At some point, your thread will become too short and you’ll need to interrupt your chain stitch line to add a new thread. Since the chain stitch consists of loops that are held in place by the next stitch, this is not as easy as with other embroidery stitches. Below is the way I change threads between lines.
Seamless circles
When the circle is almost complete there are two ways to close it with the last stitch. The first method is one I used a lot previously. Here it is:
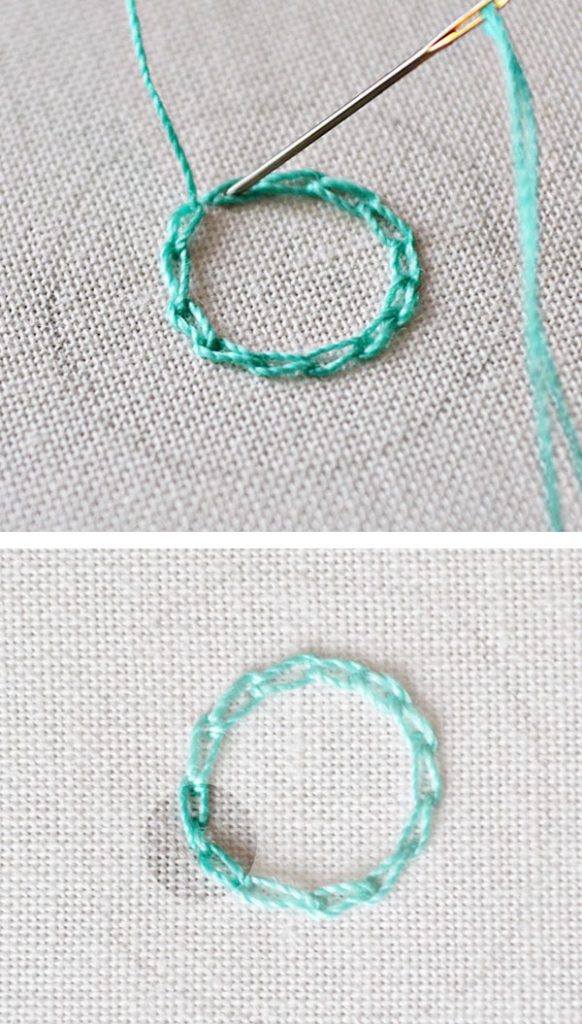
The problem with this is highlighted in the last picture. It is not a seamless line anymore! The very last stitch that holds the last loop is quite visible.
Yes, it is not THAT visible and not that dramatic. But if you fill out a whole area with chain stitches in rounds, these end stitches become much more obvious. Below is an example. Can you see the chain stitches in the “O” that are slightly more raised than the others?
This got me thinking how to avoid this kind of thing. And here is my new method:
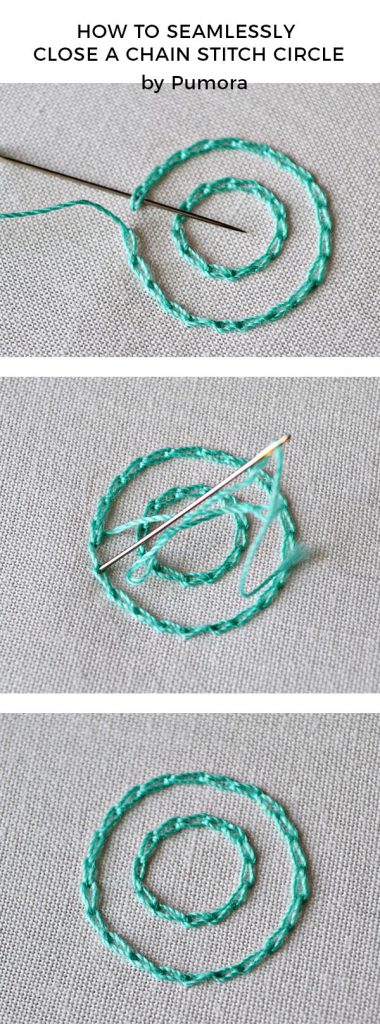
In the last picture, you can see the difference between both methods. On the left is the closing stitch in both circles. The inner circle has a distinct extra stitch, the outer circle is seamless.
These are very subtle techniques and they might have been very obvious for you. If not, then try it out and see if it makes a difference for you.
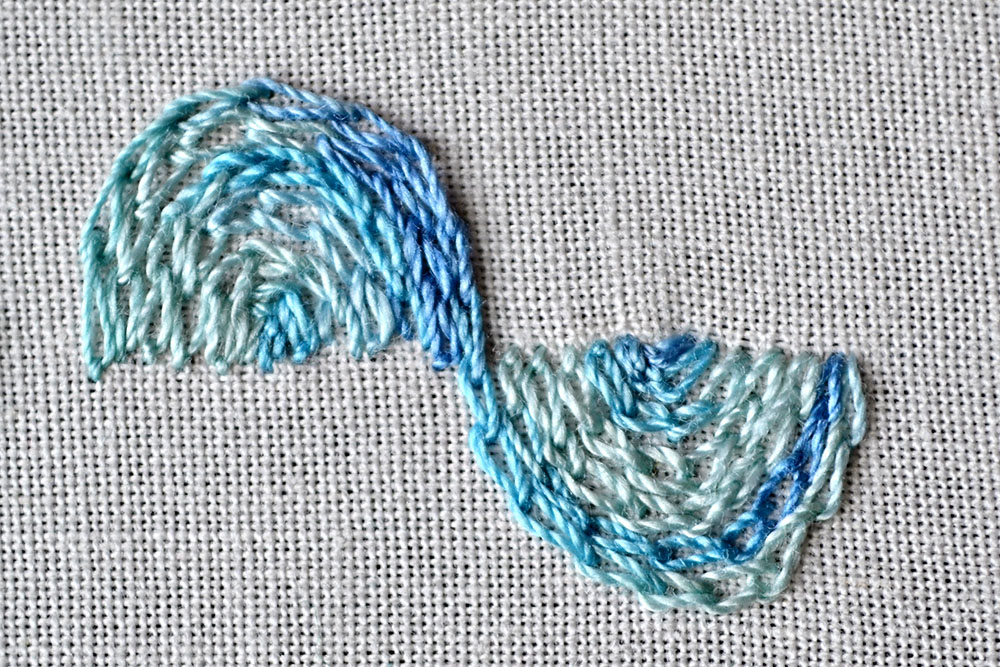
How to fill circles
You can also use chain stitches to fill a shape. There are two ways of doing so. First, you can stitch in one direction every time (right half in the picture below) or second, go back and forth.
Going in one direction works great if you want to fill a circular or oval shape where you can stitch in rounds. It creates a very even texture.
Going back and forth works best for irregular shapes. The appearance is not as even because the stitches don’t face in the same direction. However, as you can see in the picture below it is not a huge difference.
Et Voilá! Now you have perfectly neat chain stitch circles!
Do you want more tips and tricks on hand embroidery?
Join the Tutorial Alert! It is a biweekly newsletter that contains information about new tutorials & articles on Pumora, tips & tricks, and promotional content like new embroidery patterns or special discount codes.