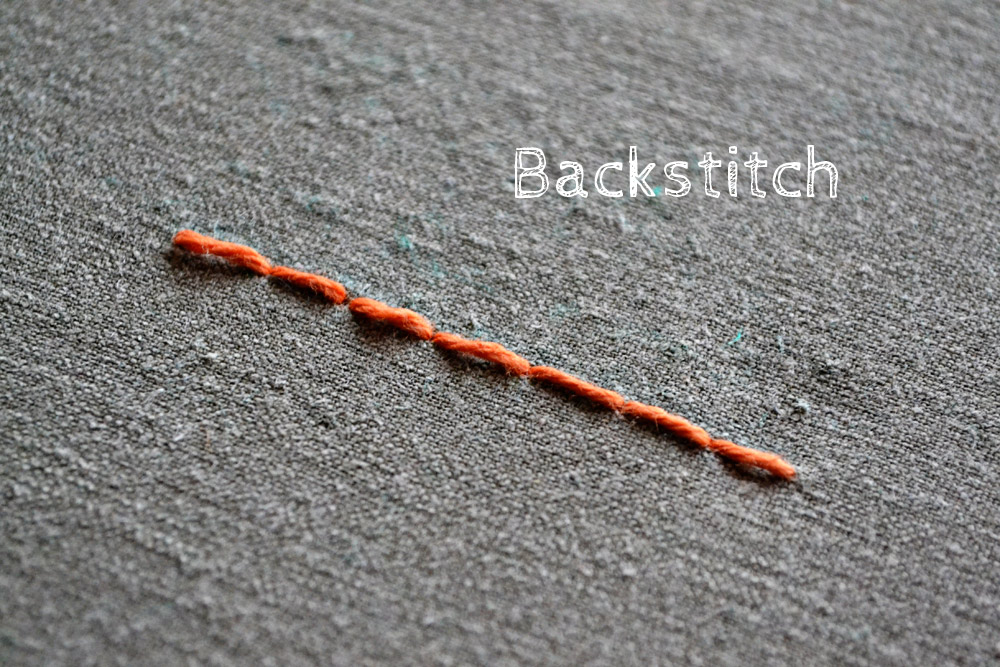
It’s day 2 of the 7 days of stitches and it’s going to be a back and forth. Yeah, I know, bad joke. Of course it’s about the BACK STITCH.
Back stitch is probably the most popular stitch with folks new to embroidery. It’s neat and versatile and you can stitch your way through all the outline embroidery patterns out there.
This is how it goes
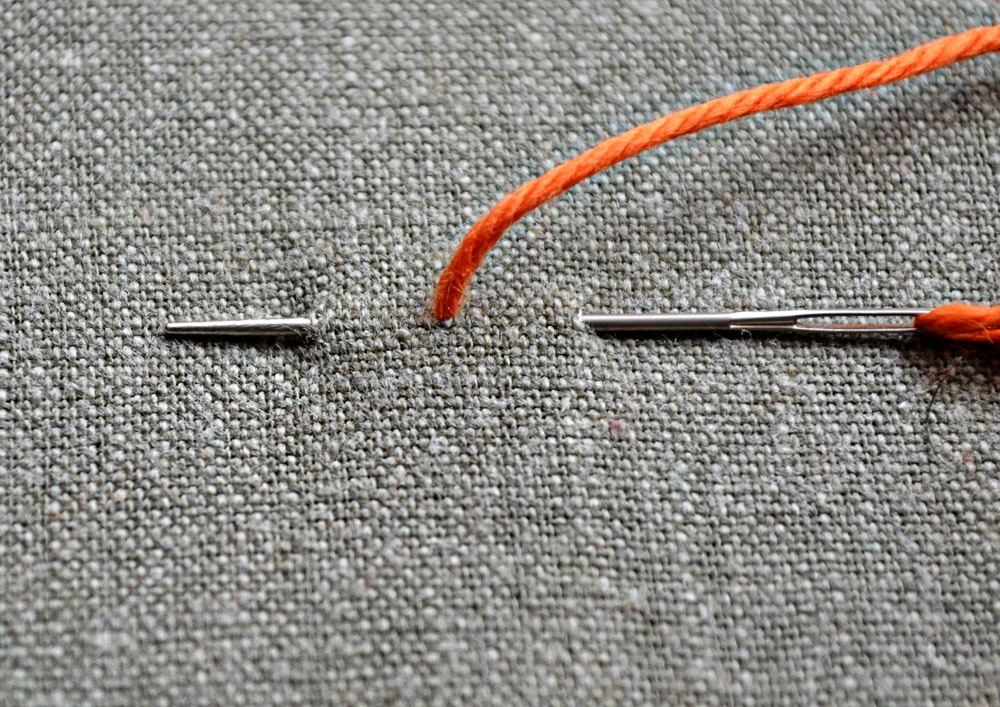
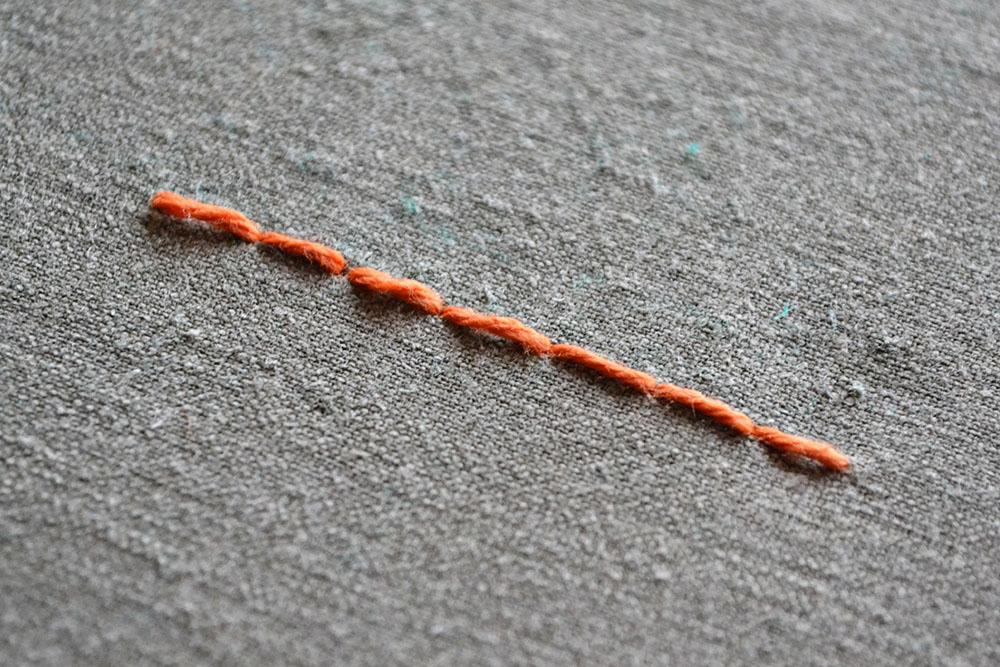
1 // Stick the needle in the fabric one stitch length on the right where the thread comes out of the fabric. Then pull the needle through the fabric one stitch length on the left where the thread comes out of the fabric.
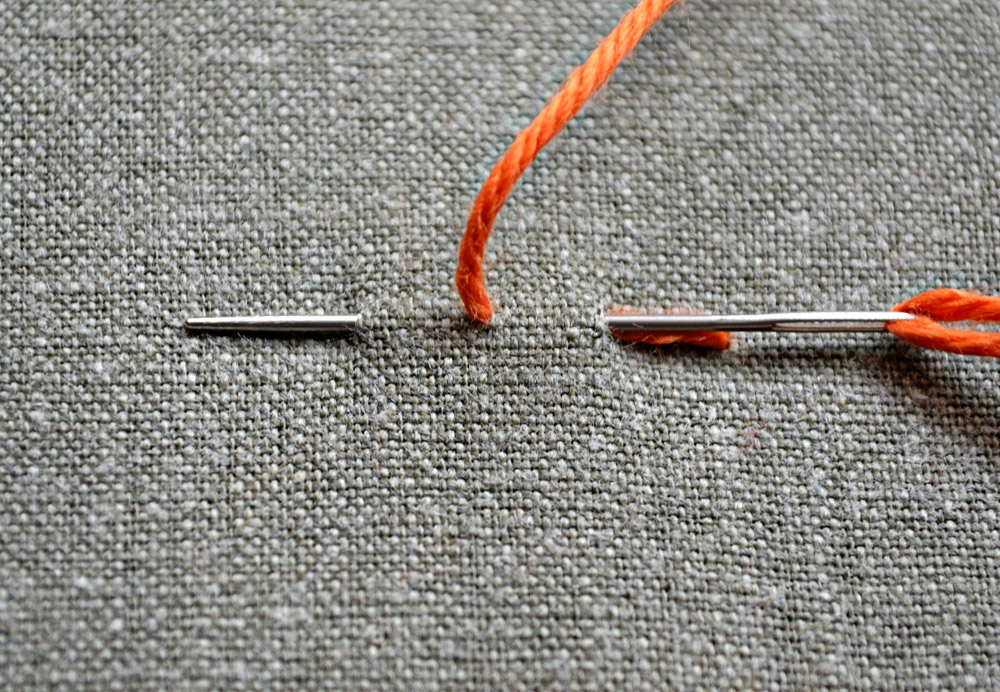
2 // Repeat stitching in the hole on the right already made by the stitch before and come out of the fabric on the left.
The backstitch creates a neat line of defined stitches on the front side and a stem stitch on the back side.
Don’t make this common mistake:
Here is something people do when they want to save thread or perhaps didn’t learned it the right way: They make step 1 like in the picture above, but then instead of going back for every stitch they make one running stitch and one backstitch.
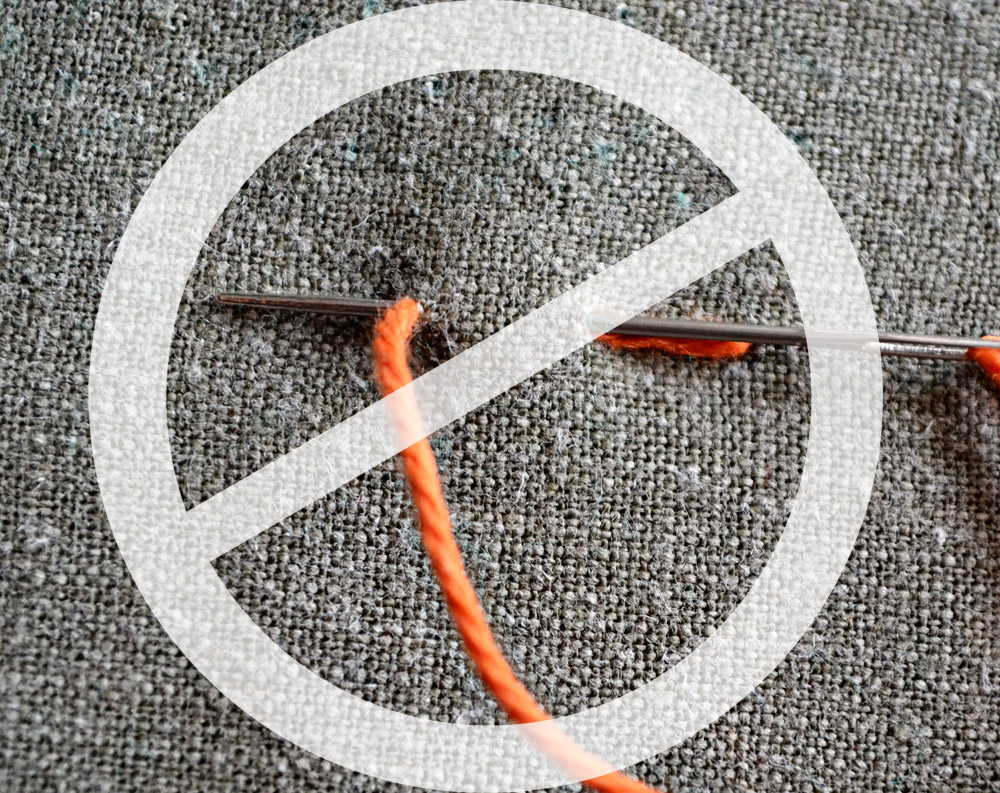
// You save the amount of one stitch every 2nd stitch by doing this, but let’s take a look at what it looks like:
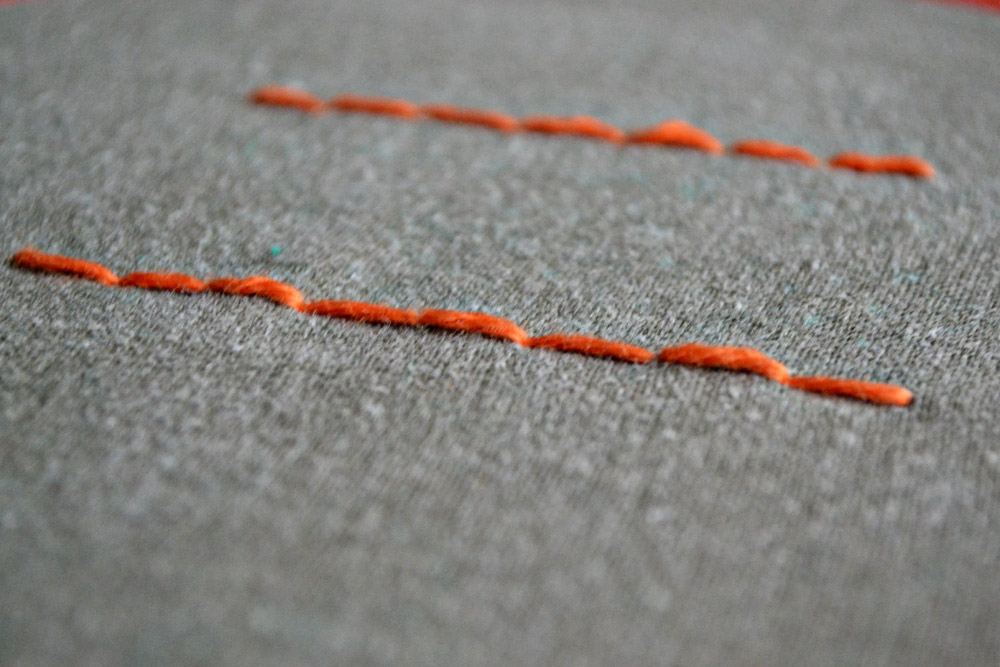
// The line in the front is the cheater-backstitch, the line in the back is the proper backstitch. Do you see the difference? Right! Every second stitch is flat (the running stitch) and the other ones rise (those are the proper backstitches). So if you compare this with the line in the back you’ll notice, that the proper backstitch line is all one height. Also because of the different directions every stitch is made (one is going left and one is going right) yarn with a sheen reflects the light differently than if the stitches were all heading in one direction.
I made this mistake in my early embroidery stages, too, often wondering why my stitches look so wonky. It was not until someone on a blog pointed out how many people make this mistake and often unknowlingly ruin their embroidery pieces this way. So my advice to you: don’t be lazy and do the proper backstitch. It looks so much better!
Do you want more tips and tricks on hand embroidery?
Join the Tutorial Alert! It is a biweekly newsletter that contains information about new tutorials & articles on Pumora, tips & tricks, and promotional content like new embroidery patterns or special discount codes.